💡 How to Make a 3D Printed Lamp – Easy DIY Guide

💡 How to Make a 3D Printed Lamp – Easy DIY Guide Introduction What if you could make a 3D printed lamp for your home or office?

🏠✨ This guide will take you step-by-step through the process of creating a basic 3D lamp, which will not require any customization or photo printing. The project is great for beginners as it integrates imagination, 3D printing, and small electronics.

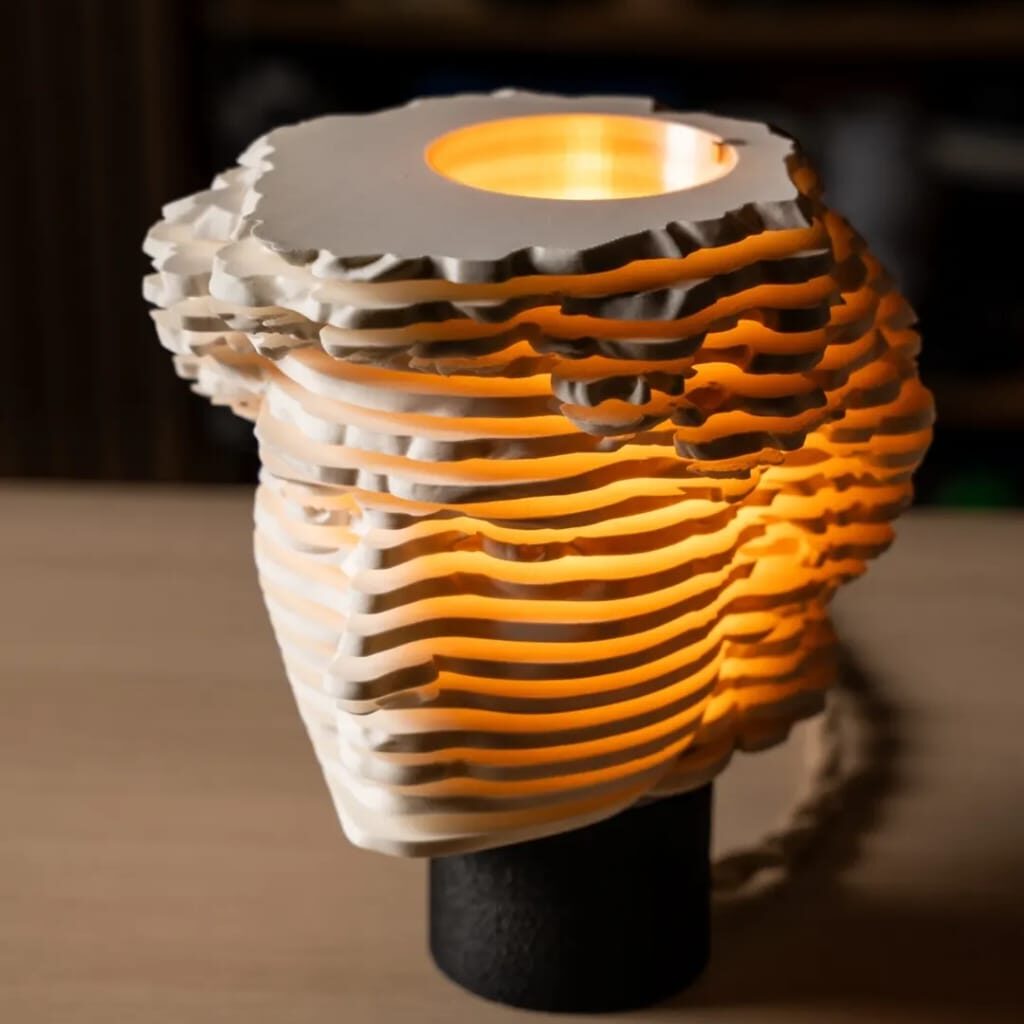
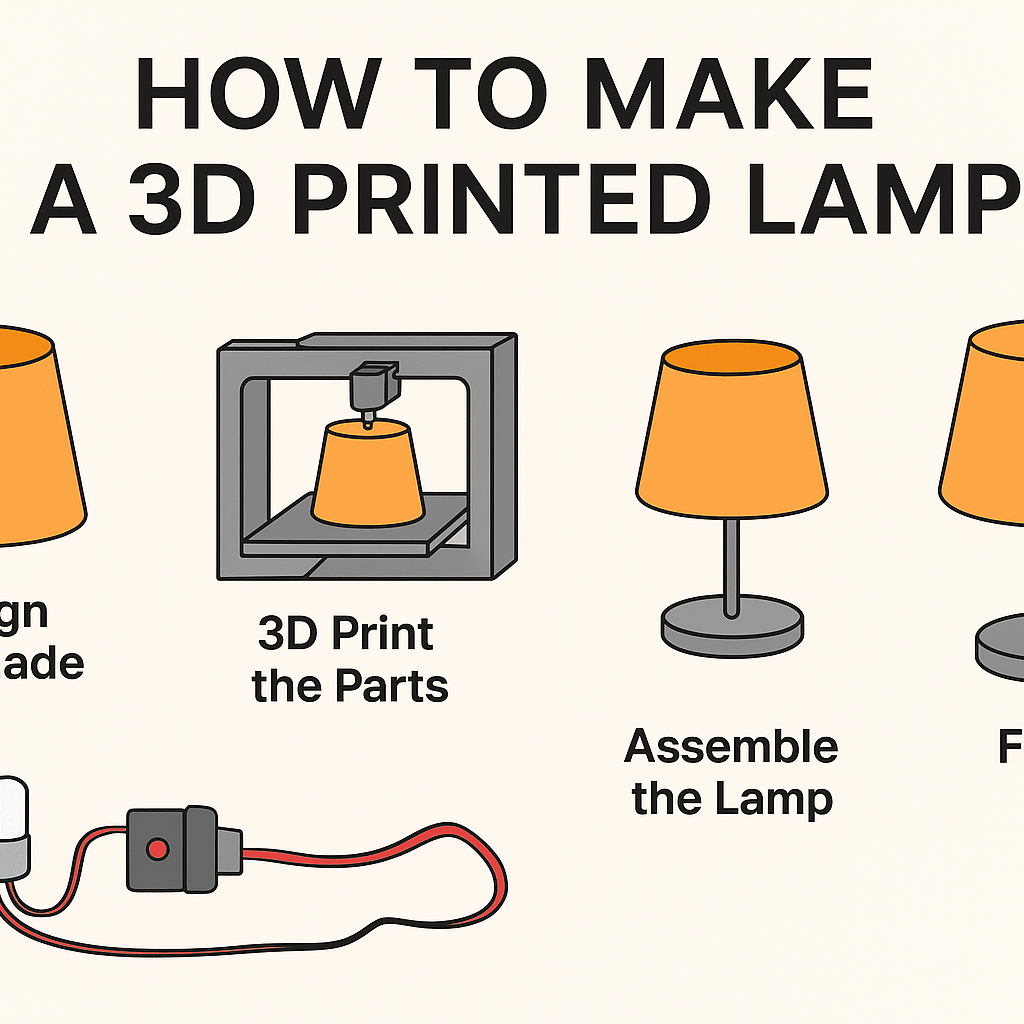
🧩 Step 1: Design the Lamp Shade You are free to create the lamp shade in Tinkercad or Fusion 360 or by using designs from Thingiverse. Utilize simple shapes (cylinder, cone, or polygon) in the design. Light diffusion will be ensured by 1.2–2 mm wall thickness. If you want a patterned light effect, make holes or slots.

🖨️ Step 2: 3D Printing the Parts Make the lamp shade and base from PLA or PETG filament. The following are the suggested settings: Layer height: 0.2 mm Infill: 20–40% Wall count: 3 Print speed: 50 mm/s White or translucent filament should be used to obtain the best diffusion of light.

⚙️ Step 3: Assembling the Lamp When you get the prints, put the parts together: The lamp shade can be glued or screwed fit on the top of the base. A mini LED light or a bulb socket can be placed inside the base. The wires can be connected to a switch or USB power safely. Check the light for uniform illumination.

🎨 Step 4: Finishing Touches Smoothen the rough surfaces with sandpaper for a subtle texture. For a high-end appearance, you may spray-paint or varnish your lamp as an option. For a change in mood, you may play around with colored LEDs. 🪄 Step 5: Enjoy Your 3D Printed Lamp Now, switch off the overhead lights and see how your DIY 3D printed lamp shines in all its glory!

🌙 It is a perfect lamp for your desk, nightstand, or study area because it is lightweight, durable, and energy-efficient.

💡 How to Make a Custom 3D Printed Lamp – Step-by-Step Guide (with Images)

Introduction

Craving a custom 3D lamp that shines with your favorite moments? 🌙✨

Custom 3D lamps are super popular gifts across India these days – they mix creativitytech stuff, and personal feelsIf you’re building one for fun or giving it to someone specialcheck out this easy walkthrough on crafting a 3D printed picture lamp right at home or in your workspace.

🧩 Step 1: Prepare the 3D Model

  • Pick a picture – ideally something welllit, like a face shot with strong lightdark differences.
  • Try tools such as Lithophane Maker or 3D Builder to turn your picture into a 3D lithophane – one that reveals an image when lit from behind.
  • Change the size – usually lamps work better between 100mm and 150mm across.
  • Keep your file saved as .STL if you’re going to 3D print it.

🖨️ Step 2: 3D Printing the Lamp

  • Try white PLA plastic if you want softer light spread.
  • Recommended printer settings:
  • Layer height: between 0.16 or 0.2 mm
  • Infill: 100%
  • Shells: 3–4
  • Print speed runs between 40 to 50 mm/s
  • You can print:
  • Cylinder lamp (bent picture)
  • Moon light (round shape)
  • A box-shaped light piece – each side shows a separate picture

⚙️ Step 3: Assembling the Base and Lighting

  • Grab an LED light base – works if it’s rechargeable or runs via USB.
  • Slide the LED into the holderthen fix your printed lithophane or moon shell above.
  • Check that the light covers everything smoothly.
  • You could actually create your own base with an FDM printer – toss on your logo or brand name while you’re at it!

🎨 Step 4: Finishing Touches

  • Gently rub down the outside area to get it nice and even.
  • If desireduse a light clear spray to guard against dirt.
  • With colored lightstry RGB LED bases that let you flip through different hues.

🪄 Step 5: Personalization Options

  • Made your lamp unique using custom words – like names, sayingsor dates inside
  • Dual shots – one facing forwardthe other backward
  • Shaped stands – like heartscirclesor crescents
  • Pack it up in a little gift box, toss on a “Made with Love” tag 💖

💰 Why 3D Printed Lamps Are the Best Personalized Gift

  • Unique & emotional
  • Budget-friendly
  • Great on birthdays, also works for anniversaries, weddings too
  • Made in India with love 🇮🇳

🛒 Want One Made for You?

You can grab your custom 3D lamp right here at

👉 7one8customsolutions.in

then grab ₹100 off your first order!

https://myfit-solutions.com/wp-content/uploads/2023/06/HEAD-SCAN-1-scaled.jpg

🎨 How to Create a Custom 3D Portrait: Resin Head + FDM Body for Affordability

🎨 How to Create a Custom 3D Portrait: Resin Head + FDM Body for Affordability

Introduction

Are you looking for a unique, personalised gift or a centrepiece that captures someone’s likeness in 3D? A custom 3D portrait is an amazing way to immortalise a moment or a person. By combining a high-detail resin-printed head with a cost-effective FDM-printed body, you get great detail where it matters (the face) and affordability for the rest. This post walks through the full journey: scanning/photos → modelling → splitting head vs body → resin print + FDM print → finishing & painting.

Step 1: Capture the Likeness

https://myfit-solutions.com/wp-content/uploads/2023/06/HEAD-SCAN-1-scaled.jpg
https://i.ytimg.com/vi/N3UvJW0HK4g/maxresdefault.jpg
  • Ask your subject (or customer) for several high-resolution photos: front, left profile, right profile, maybe a slight tilt.

  • Alternatively use a 3D scanner or photogrammetry app to create a 3D mesh of the head.

  • Clean up the scan: remove background, align the model upright, fix holes or artefacts in the mesh.

  • Important: since we’ll print the head in resin (for high detail), ensure the head geometry is high-res (fine facial features, ears, hair).


Step 2: 3D Modelling & Splitting Head + Body

https://content.instructables.com/FK1/ZHQV/H1PIT1LZ/FK1ZHQVH1PIT1LZ.jpg?auto=webp&frame=1&width=2100
https://cdn.canvaschamp.in/static/images/landingpage/miniaturefullbody/slider4.jpg
  • Use 3D modelling software (eg. Blender, ZBrush) to sculpt the body or customise the pose. The head from the scan is merged or attached to the body part.

  • Decide the split: Head = resin (more cost, more detail), Body = FDM (lower cost, simpler).

  • In the model: create a clear joint interface between head and body so they fit precisely during assembly.

  • Prepare the body for FDM: design thicker walls / simpler geometry (no ultra-fine detail) so printing and finishing is faster and cheaper.


Step 3: Printing the Head in Resin

https://i0.wp.com/simonsmagicshoppe.com/wp-content/uploads/2023/06/1_FiguresWithSupports.jpg?resize=1370%2C550&ssl=1
https://i0.wp.com/simonsmagicshoppe.com/wp-content/uploads/2021/02/RemovingSupports.jpg?resize=720%2C720&ssl=1
  • Resin printing (SLA/DLP/LCD) gives high detail: perfect for the face, hair texture, expressions.

  • Print the head with fine layer height (e.g., 0.05 mm or less) and good supports.

  • After printing: wash (remove resin residue), cure (UV light), remove supports carefully, sand any support marks.

  • Inspect for fine details: eyes, nose, mouth, eyebrows. If very high fidelity needed, you might refine further by hand.


Step 4: Printing the Body in FDM

https://image.made-in-china.com/202f0j00DOWbAlJtQMoK/Cheap-Multi-Articular-Action-Figure-PLA-Full-Body-Articulated-Robot-3D-Printing-Toy.webp
https://i.all3dp.com/workers/images/fit%3Dscale-down%2Cw%3D1284%2Ch%3D722%2Cgravity%3D0.5x0.5%2Cformat%3Dauto/wp-content/uploads/2022/06/01134921/action-figure-e1693569034459.jpg
  • FDM printing is far more cost-effective for larger volume parts like the body, clothes, base.

  • Use PLA or PETG, larger nozzle (0.4-0.6 mm) for faster build.

  • Set infill at moderate levels (20-30 %) and wall thickness for durability.

  • After printing: remove supports, sand major layer lines, fill any gaps or seams with epoxy or primer.


Step 5: Assembly & Seam Finishing

https://i.etsystatic.com/37699897/r/il/f670a4/6762295458/il_fullxfull.6762295458_1i0l.jpg
https://content.instructables.com/FK1/ZHQV/H1PIT1LZ/FK1ZHQVH1PIT1LZ.jpg?auto=webp
  • Dry-fit the head onto the body. Make sure the joint is snug.

  • Use strong adhesive (epoxy) to attach the head to the body.

  • Fill the seam visually (with putty or filler) and sand smooth. Prime the whole figure with a suitable primer to unify surface and prepare for painting.


Step 6: Painting Process & Finishing

https://i.shgcdn.com/d3a31b76-e7c5-4595-8233-b223236b1946/-/format/auto/-/preview/3000x3000/-/quality/lighter/
https://i.ytimg.com/vi/-7b1kRMxqdM/hq720.jpg?rs=AOn4CLCJobeoSk6LcnP_XgC9EjJqb0U88A&sqp=-oaymwEhCK4FEIIDSFryq4qpAxMIARUAAAAAGAElAADIQj0AgKJD
  • Start with a base coat: usually grey or white primer to give even surface.

  • For the face/head: use fine brushes or airbrush to apply skin tones, shadows, highlights, eyes, lips.

  • For the body/clothes: choose colours as per reference (photo or design), add shading and detail (buttons, textures).

  • Seal with a clear varnish (matte or satin) to protect the paint.

  • Optionally mount on a custom base (wood, acrylic) with name plate for premium feel.


Step 7: Quality Check & Delivery

  • Inspect the final piece: look for paint smudges, seam lines, unstable joints.

  • Photograph the finished product (for marketing) from multiple angles.

  • Package carefully: use bubble wrap, foam protection, and strong box to prevent damage during shipping.

  • Include care instructions: keep out of direct sunlight, dust with soft brush, avoid dropping.


Why This Hybrid Approach Saves Cost

  • Resin printing is expensive per cubic cm but yields exceptional detail.

  • FDM printing is cheaper for bulk volume and less detail-critical areas (clothes, base).

  • Splitting the head to resin and the body to FDM means you get high fidelity where it matters and cost savings elsewhere.

  • You can scale body size larger (for display impact) without blowing your budget.


Tips & Best Practices

  1. Request very clear reference photos (especially for face) for best result.

  2. When modelling, design the joint so the head can be removed if needed (for repair or shipping).

  3. Use good quality resin and post-processing for the best facial detail.

  4. In FDM, optimise orientation and supports to reduce visible layer lines.

  5. In painting, thin layers build better texture; patience is key.

  6. Always test fit head-to-body before final glue.

  7. Offer customisation: name plates, pose changes, props. This increases perceived value.


Conclusion

A custom 3D portrait (resin head + FDM body) is an incredible offering: personalised, visually striking, and competitively priced. Whether it’s for a gift, a keepsake, or a display piece, this process gives you the best of precision and affordability. Start capturing those moments, sculpting, printing and painting — and bring a cherished likeness to life in 3D.

Best Gifts in 2025

Custom Face Lamp

Light up your memories! Our custom lamps display your favorite photos in a glowing 3D effect — perfect for home décor or as a heartfelt surprise gift.

3D Custom Miniatures

Capture your memories in 3D! Our personalized miniatures are perfect for couples, families, or friends. Each piece is hand-finished with attention to detail, making it a unique keepsake that lasts forever

Custom Keychain

Carry your memories wherever you go. Choose custom keychains with your name, logo, or even a mini 3D face model — the ideal blend of style and emotion.

🎁 Best Personalized Gifting Ideas in India 2025 – Miniatures, Custom Keychains & Lamps

Looking for the perfect gift that feels truly personal? Whether it’s a birthday, anniversary, or a special celebration, custom-made gifts are the new trend in India! Make every moment unforgettable with personalized miniatures, custom keychains, and 3D lamps — crafted with love and creativity.

🧍‍♂️ 3D Custom Miniatures

Capture your memories in 3D! Our personalized miniatures are perfect for couples, families, or friends. Each piece is hand-finished with attention to detail, making it a unique keepsake that lasts forever.

🔑 Personalized Keychains

Carry your memories wherever you go. Choose custom keychains with your name, logo, or even a mini 3D face model — the ideal blend of style and emotion.

💡 Custom 3D Lamps

Light up your memories! Our custom lamps display your favorite photos in a glowing 3D effect — perfect for home décor or as a heartfelt surprise gift.


🌟 Why Choose Personalized Gifts?

  • Unique & meaningful

  • Perfect for every occasion

  • 100% customizable

  • Made in India